- The install video:https://youtu.be/6nIsvJon57E
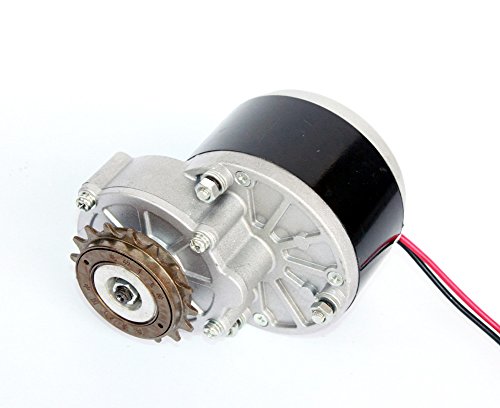
- Motor Brand:UNITE
- 1). This kit is for the bike that using the V brake on the rear wheel. If your bike uses disc brake or coaster brake, this kit does not compatible with that bike, please choose other kits. If you can not sure your bike type, please send me your bike picture, so I can recommend you the correct kit.
- 2). The motor bracket maybe does not fit your bike frame, this you need to modify the bracket by yourself, please confirm this. If you do not know how to modify, please send me your bike picture, so I can give you suggestion.
- 3). This kit just for people riding bike easier, it is not fast (26-inch bike can run about 20km/h), you’d better pedal with the motor power, this can ride longer, please understand.
- 4). The difference between 24V and 36V is the working current, if you want to ride longer, I recommend 36V kit.
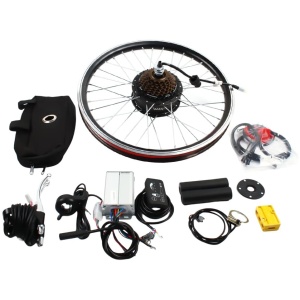
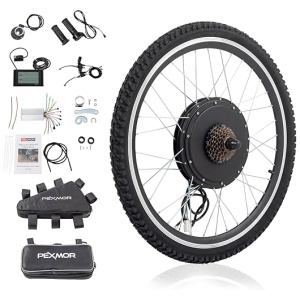
- 5). This kit does not include battery, you need to buy the battery separately, the lead acid battery and the lithium battery are all ok, and the battery capacity I recommend 24V 15Ah or 36V 12Ah.
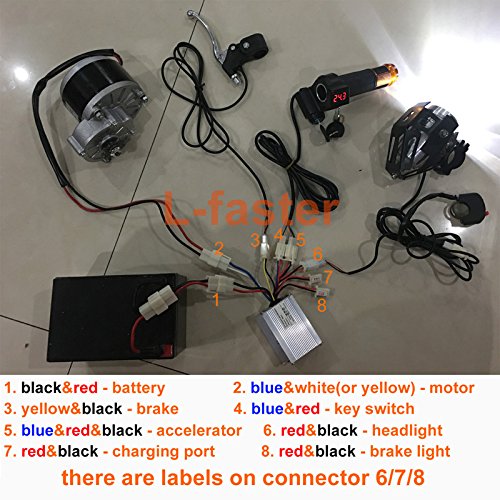
- 6). This controller comes with 1 fuse wire and 3 fuses, if you burn 1 fuse, you’d better note what makes it burnt and avoid this happen again, or please feel free to contact me for help.
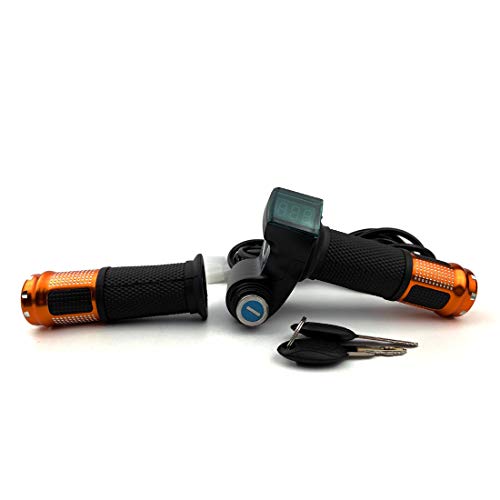
- 7). This item has 2 throttle types for choice, if you want the twist type, please choose the “key throttle” option, and if you want the thumb type, please choose the “thumb throttle” option, thank you.
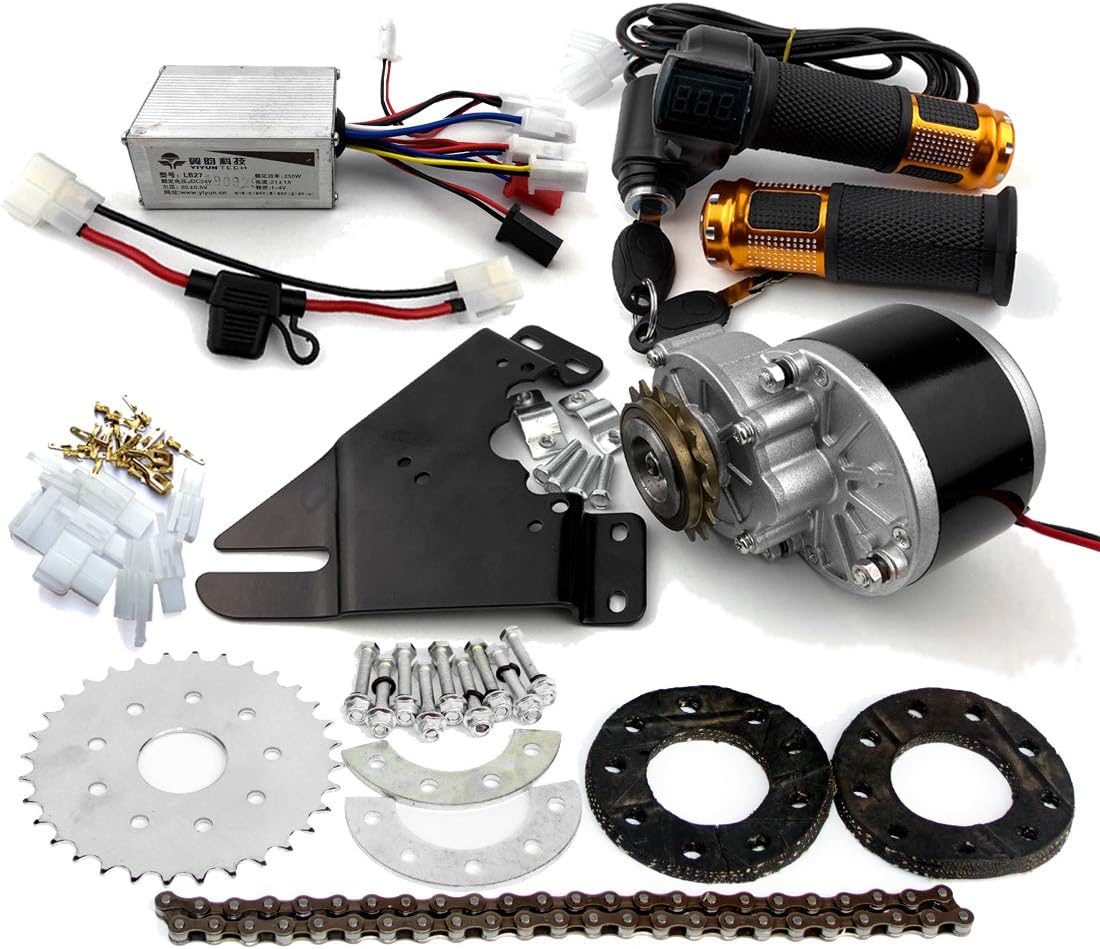
24V36V250W Electric Conversion Kit for Common Bike Left
$119.00
Last updated on September 11, 2025 3:23 pm Details
| Item Package Dimensions L x W x H | 8.46 x 7.95 x 7.83 inches |
|---|---|
| Package Weight | 4.3 Kilograms |
| Brand Name | L-faster |
| Color | 36VTwist Kit |
| Manufacturer | L-faster |
| Part Number | L-faster |
| Included Components | motor |


Larry J. –
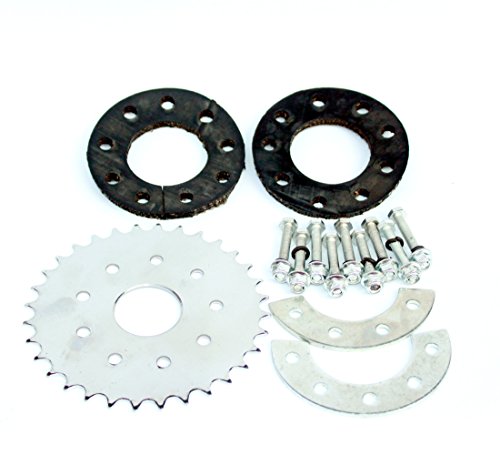
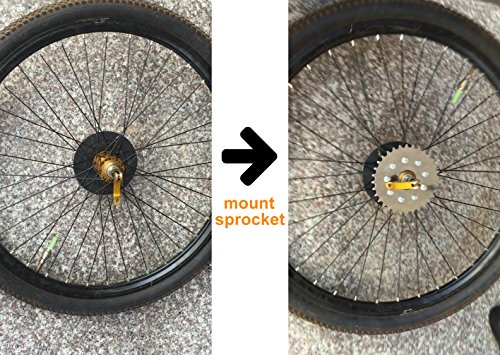
I put this on a 2018 Husky Girls bike. I powered it with two Neptune 12v 7ah batteries. I replaced the included 24v controller with a 24v 500watt one. Started out with a 20amp fuse inline, this blew first ride. Replaced with 30amp, fired it up, and it flies. Decent length ride, with the small batteries, but upped to 12ah after I saw what it does. I’m not sure what the actual motor rating is, but the motor doesn’t get hot, with over a 20amp draw on it. This was the easiest build yet. I’ve built two trikes, but this was much easier. I didn’t use the included chain, since I had some left over 410H chain, I used that. I don’t like how the regular 410 chain stretches so I only use the heavy duty chain. On the build, I omitted the outside rubber spoke plate, and removed the dust cover, behind the brake arm. Mounted the center hole of the large sprocket with perfect fit over the spoke ring. It fits with enough clearance of the spokes, and will line up with the motor sprocket, with a little bending of the mounting plate. Be sure to add in a O-ring where you take out the dust cover, or your rear bearings will pickup sand quick. I plan on putting this kit bike, through some hard rides, and I’ll follow up if I get any problems. I’ve got a little over 35 miles on the ride, so far, and haven’t done anything, but charge the batteries.
Update September 16 Still working great. No problem with motor at all. This is picture of how I worked it out on the Husky bike.
Did cut the ends off of the bracket, to make plate fit flush with frame.
Update: June 25,2020 Here it is in June, motor still runs great. Have modified the 24v to 36v, now. Added a 500w 36v controller, did this only to see if motor can handle the bigger controller. Still works great for me, only draw back was that the rear tire didn’t last long, before tread was nearly gone. No not from spinning out as you might assume, it will spin in sand but you can do that with pedal power if you’ve got the legs. I imagine the added push, plus lots of riding did the tire in, but if I had just rotated the front and back tires, when I first noticed it, would still be riding original. Motor has no noticeable heat, after full ride on my regular 6 mile run. Batteries don’t completely run down on trip, but are lower voltage at end, than original 24v batteries were. As an FYI, I am going back to the 24v as started, because three batteries are harder to balance on bike. I’ve heard of some having trouble with the sprocket failing. I haven’t had that problem, but I can see how it could happen. Wiggle the sprocket side to side, if you feel any sidewise slack, take the nut off, remove the sprocket, and look at backside. You will see a retainer ring with two little dents on it. Use whatever you can make fit both holes, and turn the ring clockwise in. This cover can get loose and unscrew, and drop the metal balls out, ruining the freewheel. That center silver looking piece, that is held with the nut, also will unscrew from the actual freewheel, and you can replace the freewheel using this aluminum bushing. L-faster sells a replacement complete freewheel that will fit this motor, here on Amazon. Happy biking.
Update 01/11/2021
Here it is January 2021, and still riding. Motor is still working great. Don’t have actual riding miles, I’ve put on it, but on third rear tire. As an FYI, get some good Silicone spray lube, and everytime you take care of cleaning and oiling your chain, spray the backside of the freewheel sprocket on the motor good too. Inside the sprocket, there are metal balls, and if they get dirty or rusty, they can make the back plate unscrew and drop the balls out. You can use the plastic straw looking part on the spray to aim the spray beside center. Spray in good, rotate the sprocket and repeat. If you see dirty looking liquid coming out, do it again. Little bit of house keeping on that and your chain, will make em last long time. I have electrified three bikes, and three trikes, since I started and they are all still going. No I only ride one, but the others are still going, with ages 12 to 74 doing the pedaling. I have to tell you though, for me it’s just as fun to build from scratch as it is to ride. This kit is far better than I had originally thought it would be. You may have to do a little thinking to figure out best way to mount the motor, but everything you need is there. Keep the chain tight, and all the bolts too, and you will get a lot of rides, you will enjoy. Happy pedaling.
BryanW –
I used two 12v 21AH Mighty Max YTX24HL-BS for Arctic Cat Prowler 650 wired in series; they are similar to deep cell marine/RV batteries. The batteries are set in plastic storage containers for adverse weather with charging terminals at the top of each container. Even though the voltage is 24v to the motor, each set of terminals above each battery only shows 12v. I wired in a 20w solar panel for charging a 12v battery with a DPST to select 1 battery at a time. You will also need a DPST switch to turn on the electric feed to the motor with a 20amp in line fuse. I went for a “test” ride; 4 miles round trip; I pedaled often but the motor was a tremendous help. You will not go super fast, but the pedaling was easy, not tiring. Upon return, each battery was at 12.59v when they started around 12.71v. The trip had some minor inclines, but I was not exhausted upon return. The batteries are not light weight; I stayed with the 24v to avoid adding the extra weight of more batteries. I don’t mind going medium speed; I needed some exercise & this is better than a treadmill in the home & once I determine my “range of operation” I will be confident while exercising. Great product; AAA+++!!! David C.
Larry J. –
weak instructions which is just a sticker on the controller, the bracket does not fit which makes it impossible to truly know cause the description is not really there just fits most bike since I have an old bike frame I hoped that was good enough. the description of volts variety said 24v, 36, but when got box sticker only said 24v. so use one description for all models in the basic bold title is all one really sees . after I ordered i did see in the long description a differents but who knew where the mistake really need to say on both the fine description to the bold on in your face one . i do not know how it works sadly i did hook it up to a battery and never ran so i can only assume it does not work anyways. the business does not allow you to contact for support..
stephen gray –
I added this 24VDC 250W motor to a 40-year old 10-speed bike. Only one of the motor frame clamps would fit my bike stays, and my left heel would hit the motor while pedaling. So I had to rotate the motor up and was able to attach 1 clamp to the seat stay, and the other to my bike rack, which supports the 24V battery. I also had to drill out the holes in my bike hub some in order to get their sprocket to fit. The 2x12VDC 7Ah sealed batteries I started out with did not work very well. I replaced those with a lighter single 24V 12 Ah Aegis battery and that works way better. It took me about 5 test rides to get everything right, mainly fixing my loose connections. There are no installation instructions, just a quick video on Youtube. I rode some steep hills, going about 10 miles, using the motor about 30% of the time and had no issues. It is a good pedal assist on hills, and on the flat I can get up to 15 MPH. Biggest complaint is that the motor chain and gearing are very noisy. Had some issues lining up gears, keeping chain tight. I would highly recommend using a Li-ion battery, such as the Aegis 24VDC 12 Ah one I have. It was expensive but well worth it, and I can recommend that battery. As for this 24V motor, only get it if you’re handy with tools and if you can get it to properly fit one of your bikes.